How to create a free synthetic check with Rust and Cloudflare
On this page
Support this blog
If you find this content useful, consider supporting the blog.
Introduction#
In this article we will explore how to create and use a very simple synthetic check, if you do not know what that is it basically means:
A synthetic check is a proactive test that simulates user interactions or network requests to monitor the performance and availability of services. Synthetic checks are also known as synthetic testing or synthetic monitoring.
If you want to try it you can fork the repository here.
A few notes, Cloudflare has some limitations on workers and also on the free tier, so if you run into issues make sure
to check the documentation, in this example I'm only doing one check and managing one action, if you need to account for
more scenarios you can create some sort of router in the function scheduled (that's what we will use since this will
be run by a defined CRON).
Code#
First, lets check the code to see what it looks like and declare what we would be testing and what happens in case of
failure... This file is called lib.rs:
use serde_json::json;
use std::sync::atomic::{AtomicU32, Ordering};
use worker::*;

static FAILED_CHECKS: AtomicU32 = AtomicU32::new(0);
const MAX_FAILURES: u32 = 3;

#[event(scheduled)]
pub async fn scheduled(_event: ScheduledEvent, env: Env, _ctx: ScheduleContext) {
    // Create a fetch request to our health endpoint
    let url = env
        .var("HEALTH_CHECK_URL")
        .expect("HEALTH_CHECK_URL must be set")
        .to_string();

    let req = Request::new_with_init(&url, RequestInit::new().with_method(Method::Get))
        .expect("Failed to create request");

    match Fetch::Request(req).send().await {
        Ok(resp) => {
            if resp.status_code() == 200 {
                // Reset counter on successful check
                console_log!("Health check successful for {}! 🎉", url);
                FAILED_CHECKS.store(0, Ordering::SeqCst);
            } else {
                console_log!(
                    "Health check failed with status code: {}, for: {}",
                    resp.status_code(),
                    url
                );
                handle_failed_check(&env).await;
            }
        }
        Err(e) => {
            console_log!("Health check failed with error: {:?}, for: {}", e, url);
            handle_failed_check(&env).await;
        }
    }
}

async fn handle_failed_check(env: &Env) {
    let url = env
        .var("HEALTH_CHECK_URL")
        .expect("HEALTH_CHECK_URL must be set")
        .to_string();
    let current_failures = FAILED_CHECKS.fetch_add(1, Ordering::SeqCst) + 1;

    console_log!(
        "Health check failed {} times for {} 😓",
        current_failures,
        url
    );

    if current_failures >= MAX_FAILURES {
        console_log!("Sending notification to Slack 🚨");
        if let Ok(webhook_url) = env.var("SLACK_WEBHOOK_URL") {
            let message = json!({
                "text": format!("🚨 Health check failed {} times in a row for service {}! Please check the service.", current_failures, url)
            });

            let req = Request::new_with_init(
                webhook_url.to_string().as_str(),
                RequestInit::new()
                    .with_method(Method::Post)
                    .with_body(Some(serde_json::to_string(&message).unwrap().into())),
            )
            .expect("Failed to create webhook request");

            match Fetch::Request(req).send().await {
                Ok(_) => console_log!("Successfully sent Slack notification"),
                Err(e) => console_log!("Failed to send Slack notification: {:?}", e),
            }
        } else {
            console_log!("SLACK_WEBHOOK_URL not configured!");
        }

        // Reset counter after notification
        FAILED_CHECKS.store(0, Ordering::SeqCst);
    }
}
NOTE: you need to configure these two environment variables, one is defined via wrangler and the secret can be created with the following command:
npx wrangler secret put SLACK_WEBHOOK_URL
In simple steps:
- Check the URL provided in the env var: HEALTH_CHECK_URL
- Retry 3 times
- Send Slack notification
Deploying it#
If we want to deploy it manually we can do so by running:
❯ npx wrangler deploy

 ⛅️ wrangler 3.101.0
--------------------

Running custom build: cargo install -q worker-build && worker-build --release
[INFO]: 🎯  Checking for the Wasm target...
[INFO]: 🌀  Compiling to Wasm...
    Finished `release` profile [optimized] target(s) in 0.04s
[INFO]: ⬇️  Installing wasm-bindgen...
[INFO]: Optional fields missing from Cargo.toml: 'description', 'repository', and 'license'. These are not necessary, but recommended
[INFO]: ✨   Done in 0.25s
[INFO]: 📦   Your wasm pkg is ready to publish at ~/Webs/healthcheck/build.

  shim.mjs  16.3kb

⚡ Done in 4ms
Total Upload: 439.09 KiB / gzip: 159.83 KiB
Worker Startup Time: 1 ms
Your worker has access to the following bindings:
- Vars:
  - HEALTH_CHECK_URL: "https://redbeard.team/en/blog"
Uploaded healthcheck (4.00 sec)
Deployed healthcheck triggers (0.41 sec)
  schedule: */2 * * * *
Current Version ID: 7030ba06-1be0-4376-9ced-0c9ba6ef2abc
Alternatively we can just let the Github Action deploy it automatically for us, Cloudflare has a CI/CD system but it doesn't support Rust yet nor sudo, so you cannot install packages to build and release from there, for this you only need two environment variables in your secrets as you will see in the action (use the template for workers when creating the key).
name: Deploy Worker

on:
  push:
    branches:
      - master
  workflow_dispatch:

jobs:
  deploy:
    runs-on: ubuntu-latest
    name: Deploy
    steps:
      - uses: actions/checkout@v4

      - name: Setup Rust
        uses: actions-rs/toolchain@v1
        with:
          toolchain: stable
          target: wasm32-unknown-unknown
          override: true
          profile: minimal

      - name: Install wrangler
        run: npm install -g wrangler

      - name: Build and Deploy
        run: |
          cargo install -q worker-build
          worker-build --release
          wrangler deploy
        env:
          CLOUDFLARE_API_TOKEN: ${{ secrets.CLOUDFLARE_API_TOKEN }}
          CLOUDFLARE_ACCOUNT_ID: ${{ secrets.CLOUDFLARE_ACCOUNT_ID }}
And last but not least, the Wrangler configuration (wrangler.toml):
name = "healthcheck"
main = "build/worker/shim.mjs"
compatibility_date = "2025-01-12"

workers_dev = false
preview_urls = false

[build]
command = "cargo install -q worker-build && worker-build --release"

[triggers]
crons = ["*/2 * * * *"]

[vars]
HEALTH_CHECK_URL = "https://redbeard.team/en/blog"

[observability]
enabled = true
head_sampling_rate = 1
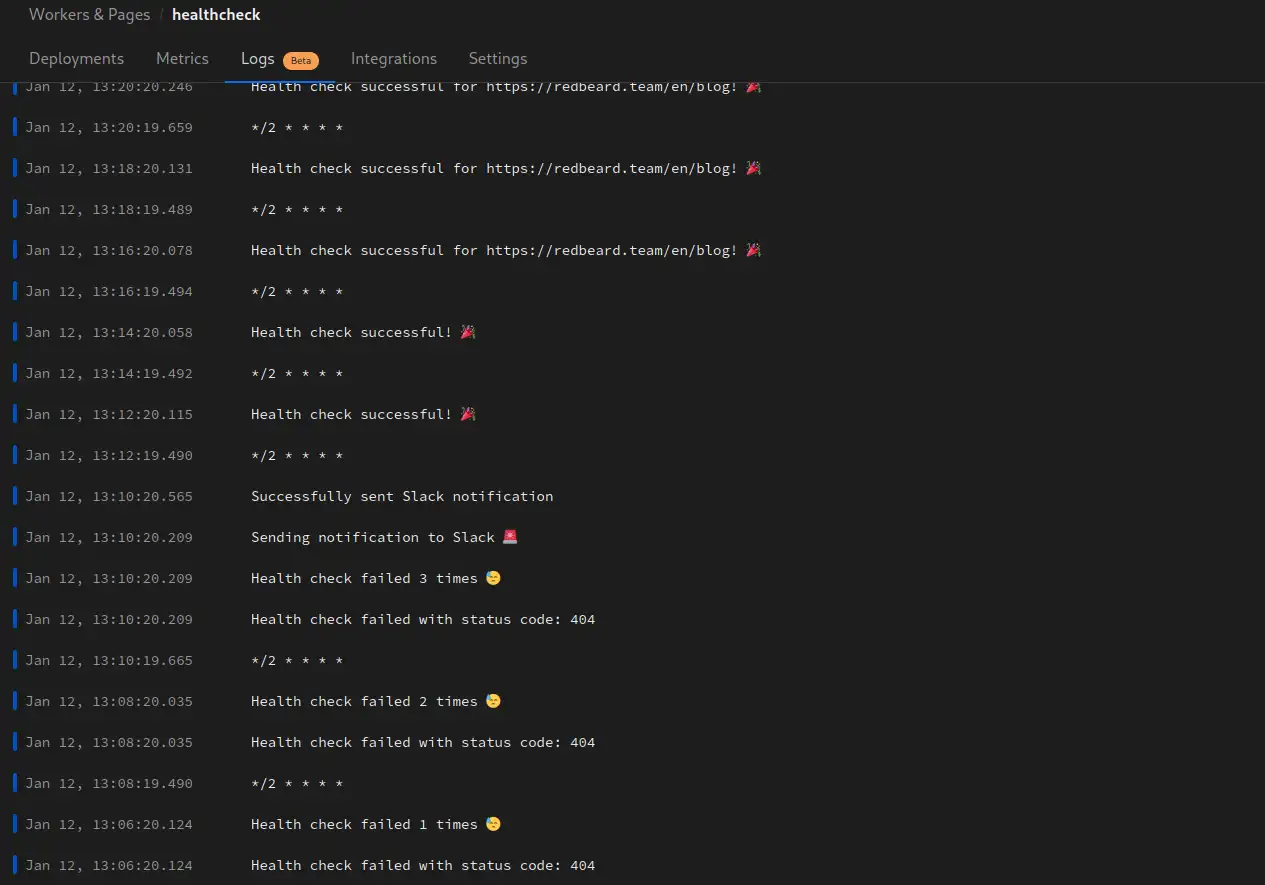
The result#
The logs should look something like this:
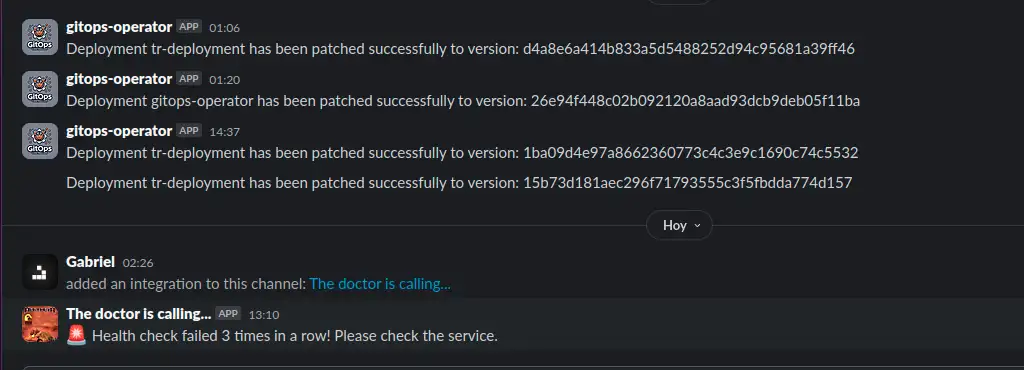
And when things don't go well, you should receive a Slack message wherever you configured the webhook.
I hope you liked it and found it useful, until next time!
$ Comments
Online: 0Please sign in to be able to write comments.